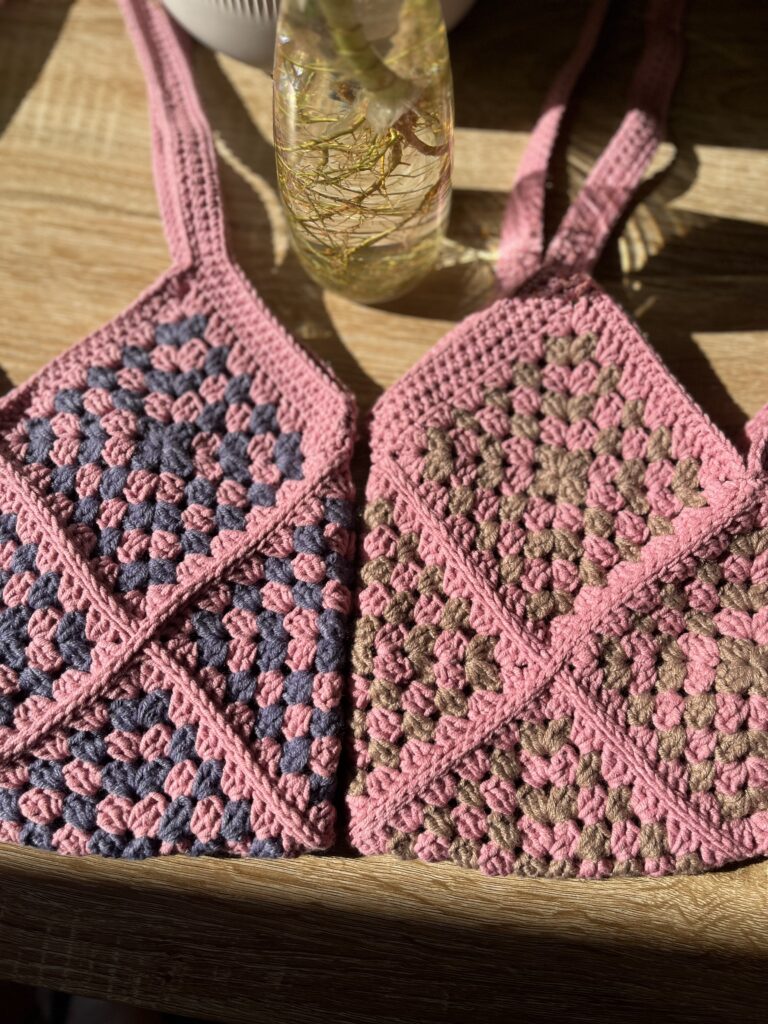
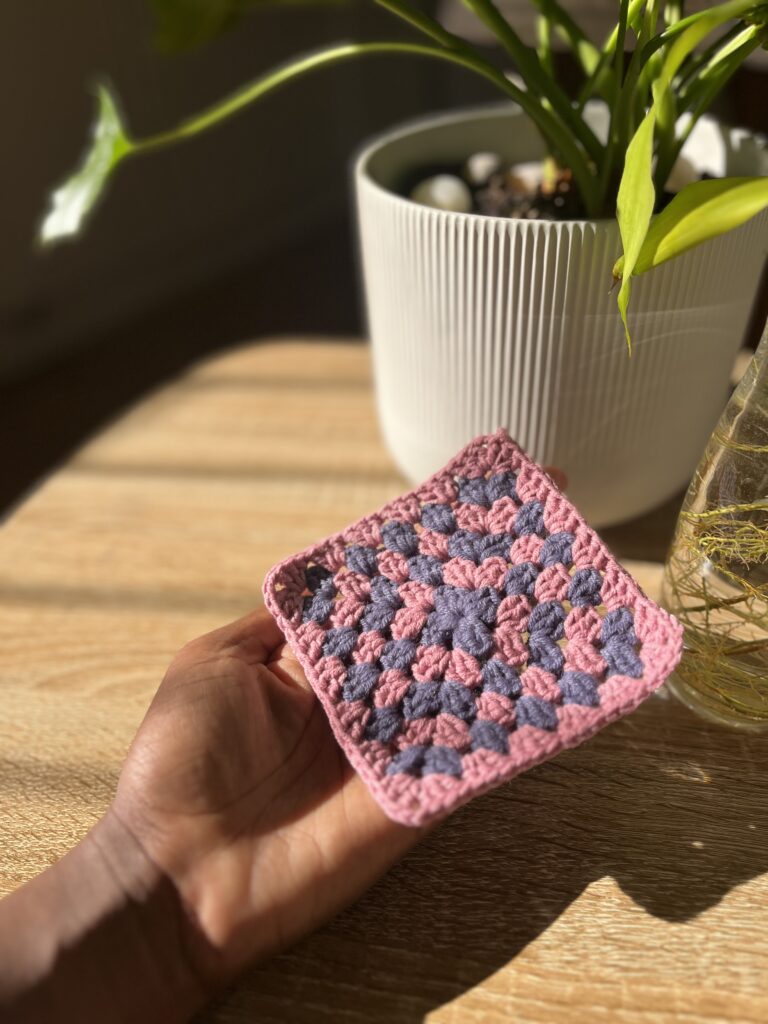
If you are looking for a cute bag that is easy to make you need not look any further; this Gigi’s Granny Square Tote is the one for you. This pattern gives a step by step how to guide to crochet this tote bag.
Overview
| Project Name | Gigi’s Granny Square Tote |
| Project Manager | Designed by Gisella from Hookedwithgigi.com |
| Pattern Release Date | August 2024 |
| Background | I wanted to make a granny square bag that was conventional yet cute. |
| Skill level | Easy + |
| Materials | DK Coffee Cotton yarn in two colours [ Main colour: pink and the accent colour: brown]3mm hook (a size smaller than the recommended)Stitch markersScissorsDarning needle Lining Materials Inner lining fabric Needle pinsNeedle (sewing machine is optional)Thread (in the main colour) |
| To note | This pattern uses the half double crochet, double crochet, single crochet and slip stitch stitches. |
| Abbreviations | 2DC – 2 Double crochets3DC – 3 Double crochets (double crochet cluster)SC – Single crochetSl st- Slip stitch Ch – Chain |
Disclaimer
- The odd rounds are worked in the accent colour and the even rounds are worked in the main colour.
- Begin each round in the opposite corner.
- Each double crochet cluster is worked into the space between two clusters of the previous round.
- The starting chain 4 counts as a double crochet.
How to crochet a granny square
Granny square pattern on the blog.
Foundation ring: Ch 3, sl st into the first ch,
Round 1: Ch 4, 3DC into the ch 3 centre, ch 2, 3DC, ch 2, 3DC, ch 2, 2DC and sl st between the ch 4 space before the first cluster. Leaving a small tail to weave in, cut the yarn.
Round 2: In the opposite corner attach your main colour. Ch 4, 3DC in the same ch 2 space, [in the next ch 2 spaces (3D, ch 2, 3DC)] 3 times. 2DC into the first ch 2 space, sl st between the ch 4 space before the first cluster. Cut the yarn.
Round 3: In the opposite corner attach your accent colour. Ch 4, 3DC in the same ch 2 space, *in the space between the clusters of the previous round work 3DC. In the next ch 2 space (3DC, ch 2, 3DC). Repeat from the * two more times. In the space between the double crochet clusters from the previous round work 3DC. 2DC into the first ch 2 space, sl st between the ch 4 space before the first cluster. Cut the yarn.
Round 4: In the opposite corner attach your main colour. Ch 4, 3DC in the same ch 2 space, *[in the two spaces between the two clusters of the previous round work 3DC] twice. In the next ch 2 space (3DC, ch 2, 3DC). Repeat from the * two more times. [In the two spaces between the double crochet clusters from the previous round work 3DC] twice. 2DC into the first ch 2 space, sl st between the ch 4 space before the first cluster. Cut the yarn.
Round 5: In the opposite corner attach your accent colour. Ch 4, 3DC in the same ch 2 space, *[in the three spaces between the two clusters of the previous round work 3DC] twice. In the next ch 2 space (3DC, ch 2, 3DC). Repeat from the * two more times. [In the three spaces between the double crochet clusters from the previous round work 3DC] twice. 2DC into the first ch 2 space, sl st between the ch 4 space before the first cluster. Cut the yarn.
Round 6: In the opposite corner attach your main colour. Ch 4, 3DC in the same ch 2 space, *[in the four spaces between the two clusters of the previous round work 3DC] twice. In the next ch 2 space (3DC, ch 2, 3DC). Repeat from the * two more times. [In the four spaces between the double crochet clusters from the previous round work 3DC] twice. 2DC into the first ch 2 space, sl st between the ch 4 space before the first cluster. Cut the yarn.
Work 9 more squares
How to assemble the granny squares
Using stitch markers, connect the squares where the corners intersect according to the diagram below.
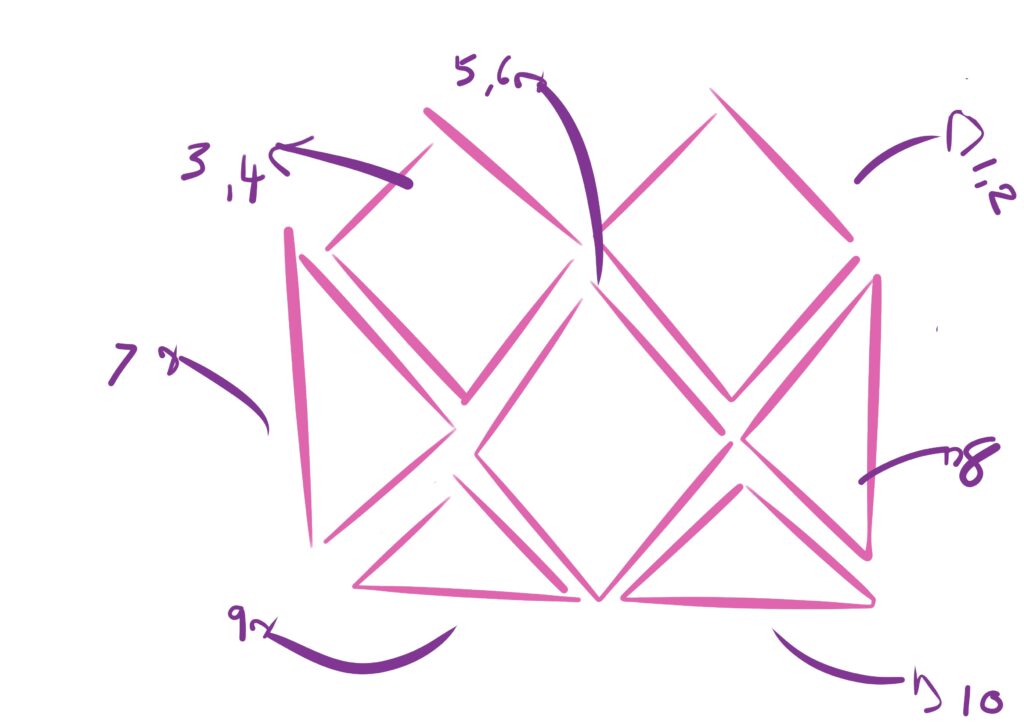
The triangles represent folded squares, and the full squares have an identical square behind them. There should be 11 stitch markers holding the bag in place.
After all the squares have been connected with the stitch markers, join them with flat slip stitch seam. Join only the inside loops, ensuring that the stitches on either side of the squares correlate.
Join the yarn from the point where squares 1, 3 & 5 meet, join to where 3, 5 & 7 meet. Continue joining until the other side where 2, 4 & 6 meet. At this point do not cut the yarn but tilt the bag and continue joining along the line; the join should end at 1, 3 & 5, cut the yarn.
The next join will begin at 3 & 7 and follow the line until 2 & 8, cut the yarn.
The last join will begin at 1 & 8 and follow the line until 4 & 7 and cut the yarn.
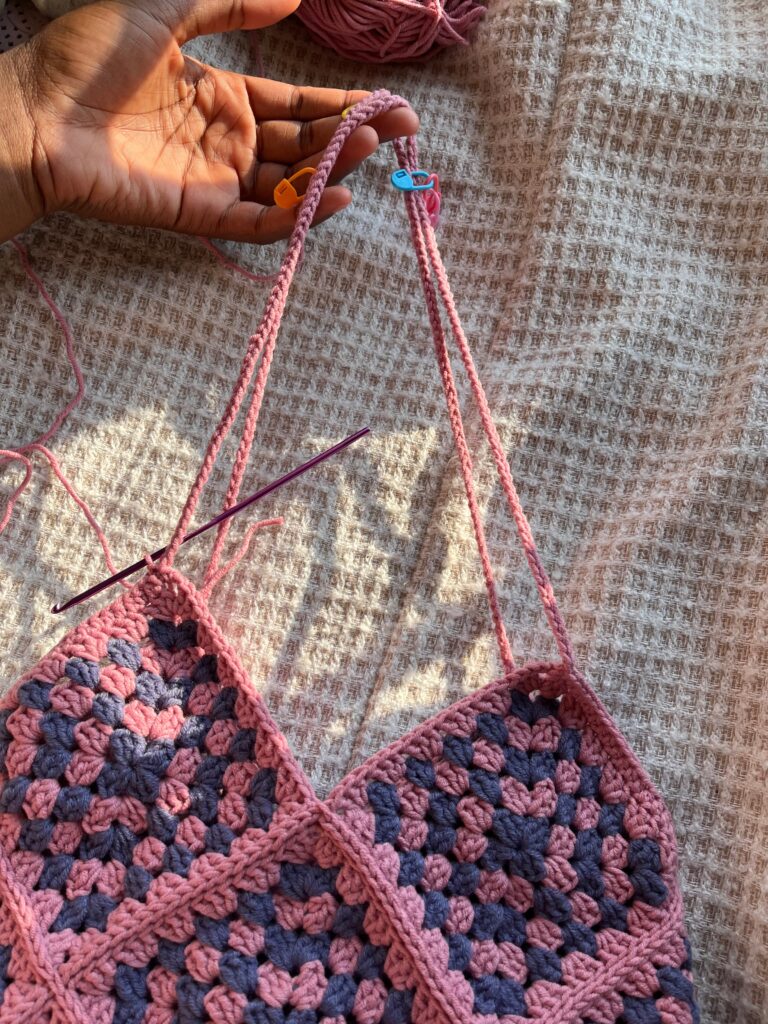
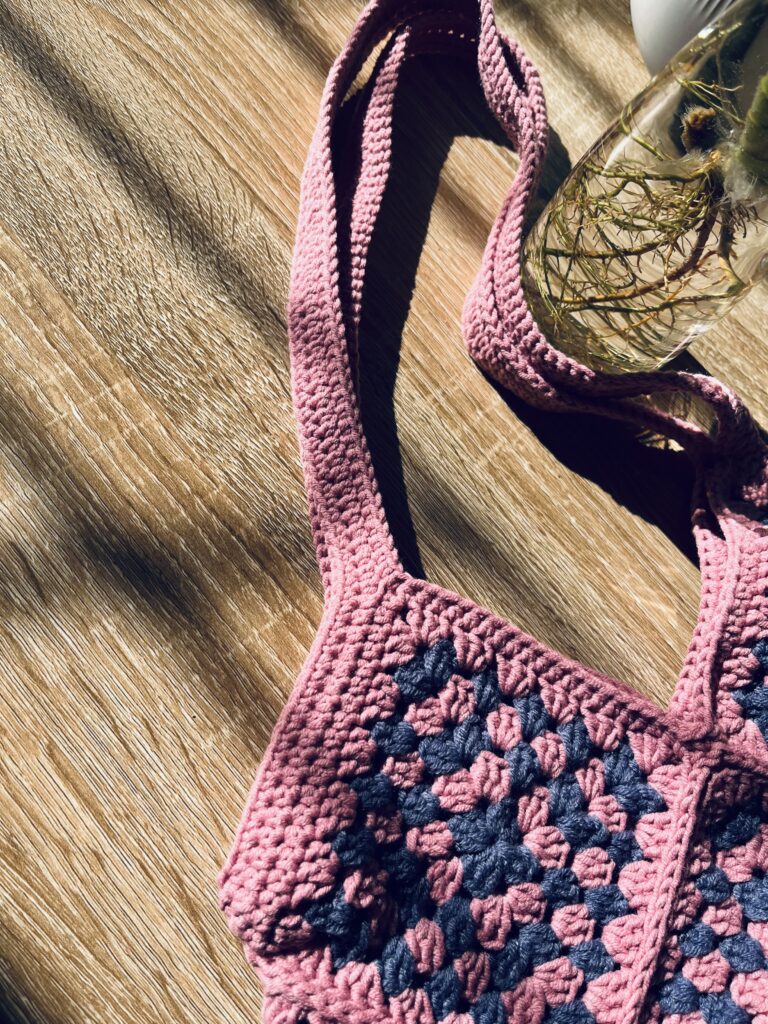
How to crochet the straps
The outside of the strap
Attach yarn into the first stitch from a left peak, chain 1 and half double crochet until the (outside) valley; work one single crochet into that valley and continue half double crochets until the next peak. Work one half double crochet into the peak. Chain 110 for the strap, connect with half double crochet into the next peak. Ensuring that the chain is not tangled.
Half double crochet until the other outside valley, single crochet in the valley. Continue half double crochets until the next peak, work one half double crochet in the peak and chain 110 for the other strap. Connect with a half double crochet in the next peak, ensuring that it is not tangled.
Slip stitch into the top of the chain 1, chain 1 and *half double crochet until 2 stitches before the single crochet in the valley. Work 2 half double crochets together (decrease), single crochet into the single crochet. Work 2 half double crochets together (decrease). Continue half double crochet until the chain strap.
Work half double crochets into the chain strap, when done with the chain strap repeat from *
When at the chain 1, slip stitch into the top.
Chain 1 and work single crochets all around, 2 stitches before the valleys work 2 single crochets together (decrease), repeat until the chain 1. Slip stitch into the top and cut the yarn.
The inside of the strap
Attach yarn to the inside of a peak, chain 1 and half double crochet (in the peak), continue working half double crochets. In the valley work one single crochet. And then continue half double crocheting until the peak, work a half double crochet into the peak.
Single crochet around the strap, work half double crochet in the peak where the chain one was made. Slip stitch into the chain one; cut the yarn.
Repeat for the other strap.
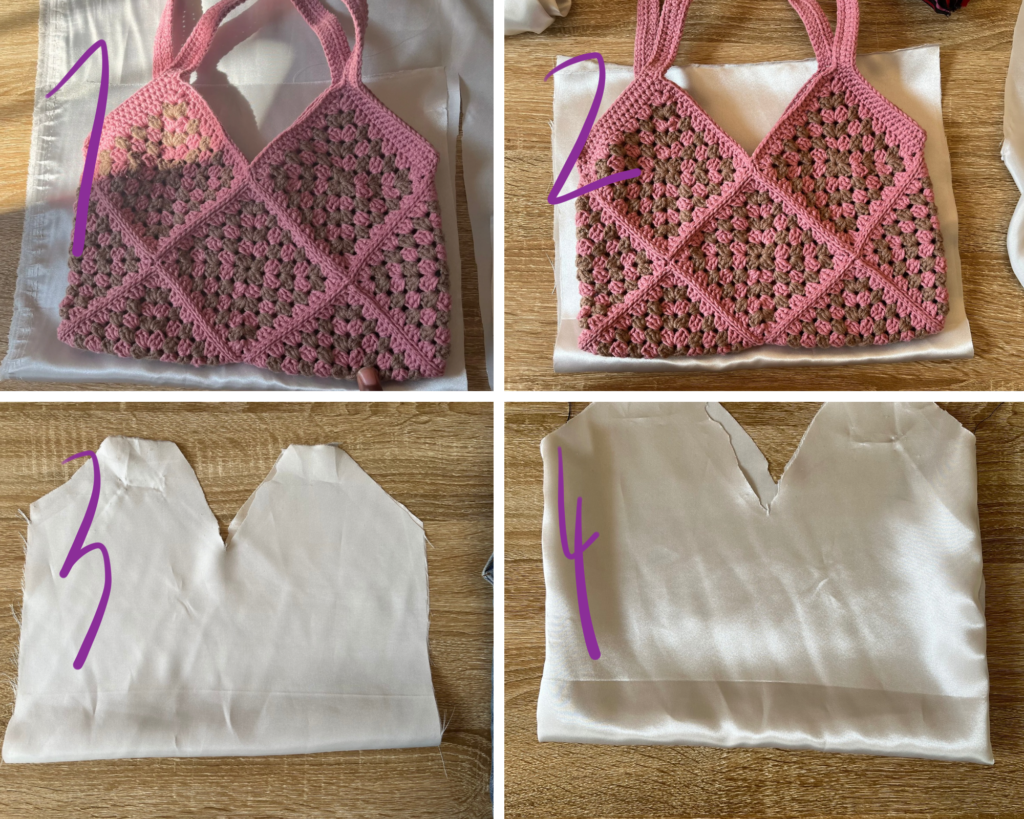
How to sew the bag lining
- Take the fabric, folded in half and place the bag on top of it. Measure half an inch on the left, right and the top of the fabric. This half an inch is for seam allowance.
- Cut the fabric leaving a rectangle, which in turn is a square when folded in half. Place the bag on the square.
- Cut out triangles in the valleys of the bag, leaving half an inch on either side. Sew the left and right sides together.
- After sewing the sides closed, turn the fabric inside out. This will be the inside of the bag.
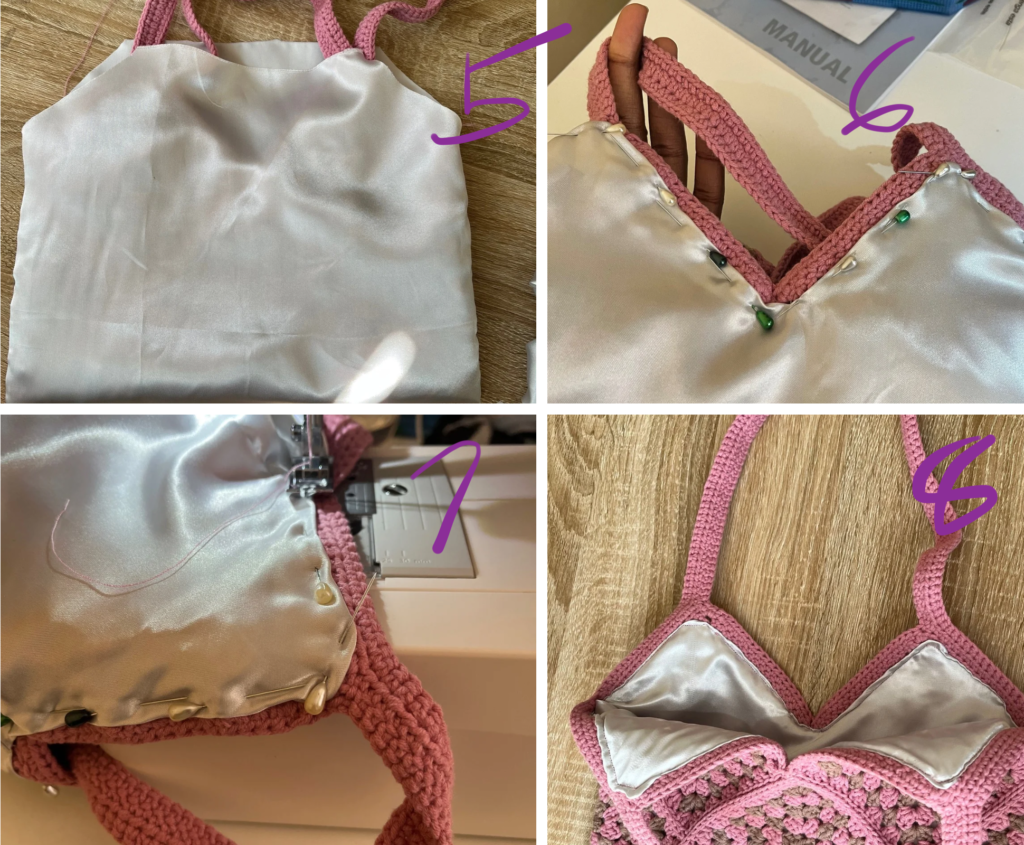
5. Turn the bag inside out and slip it into the fabric.
6. Using needle pins fold half an inch of the fabric into the bottom of the (first) half double crochet row.
7. Using a straight stitch sew along the edge of the fabric. Ensuring that the thread is the same colour as the main colour of the bag.
8. Sew all around.
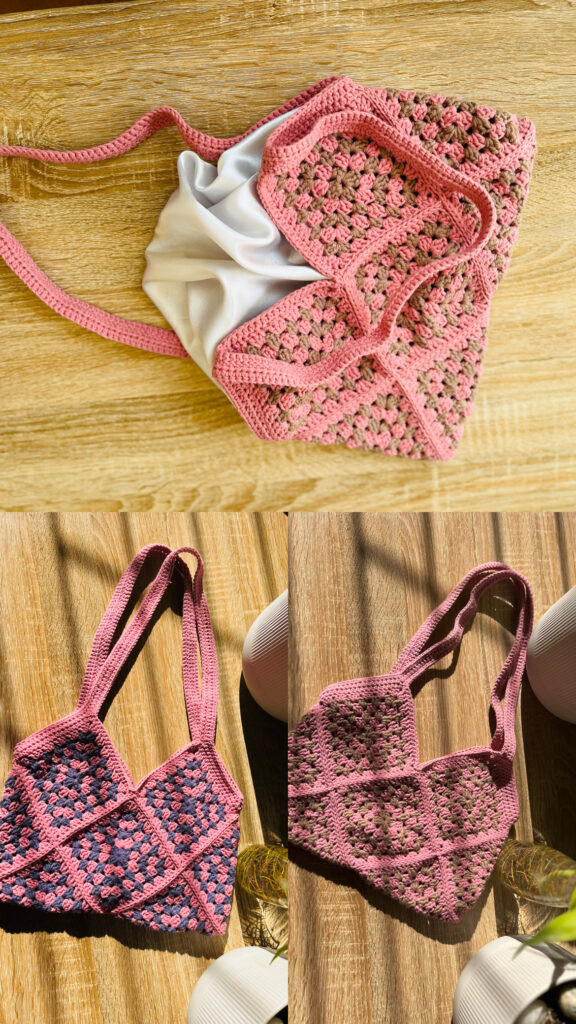
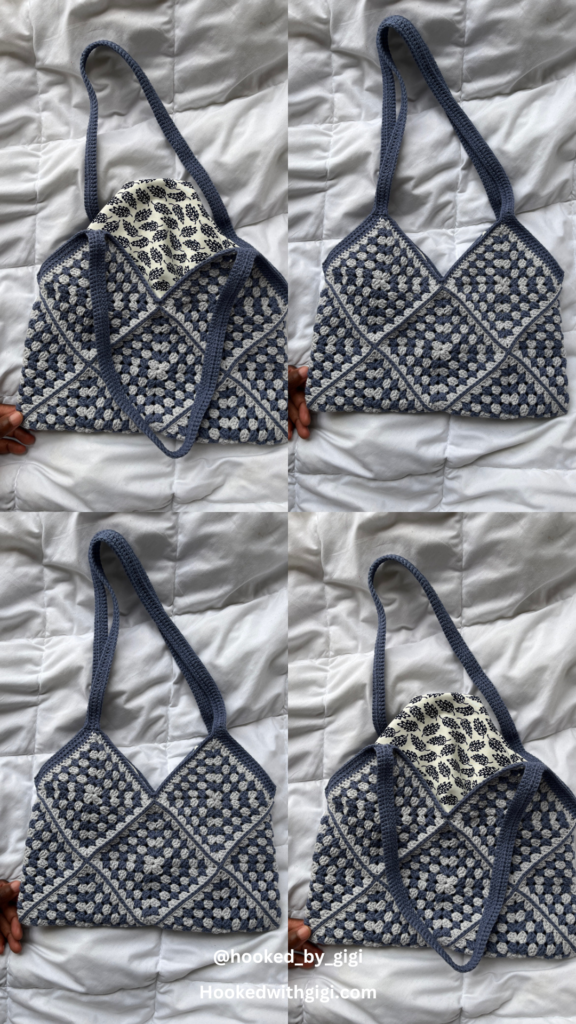
Gigi’s Granny Tote
Thank you so much for choosing Gigi’s Granny Tote, it means a ton. If you would not mind tagging me in your make, I would really appreciate it 😉
For pattern support send me a DM @hooked_by_gigi or alternatively find me on my blog Contact – Hooked With Gigi

The copy, distribution or commercial use of this pattern is not allowed. The recording of a YouTube video using this pattern or inspired by it is not allowed.